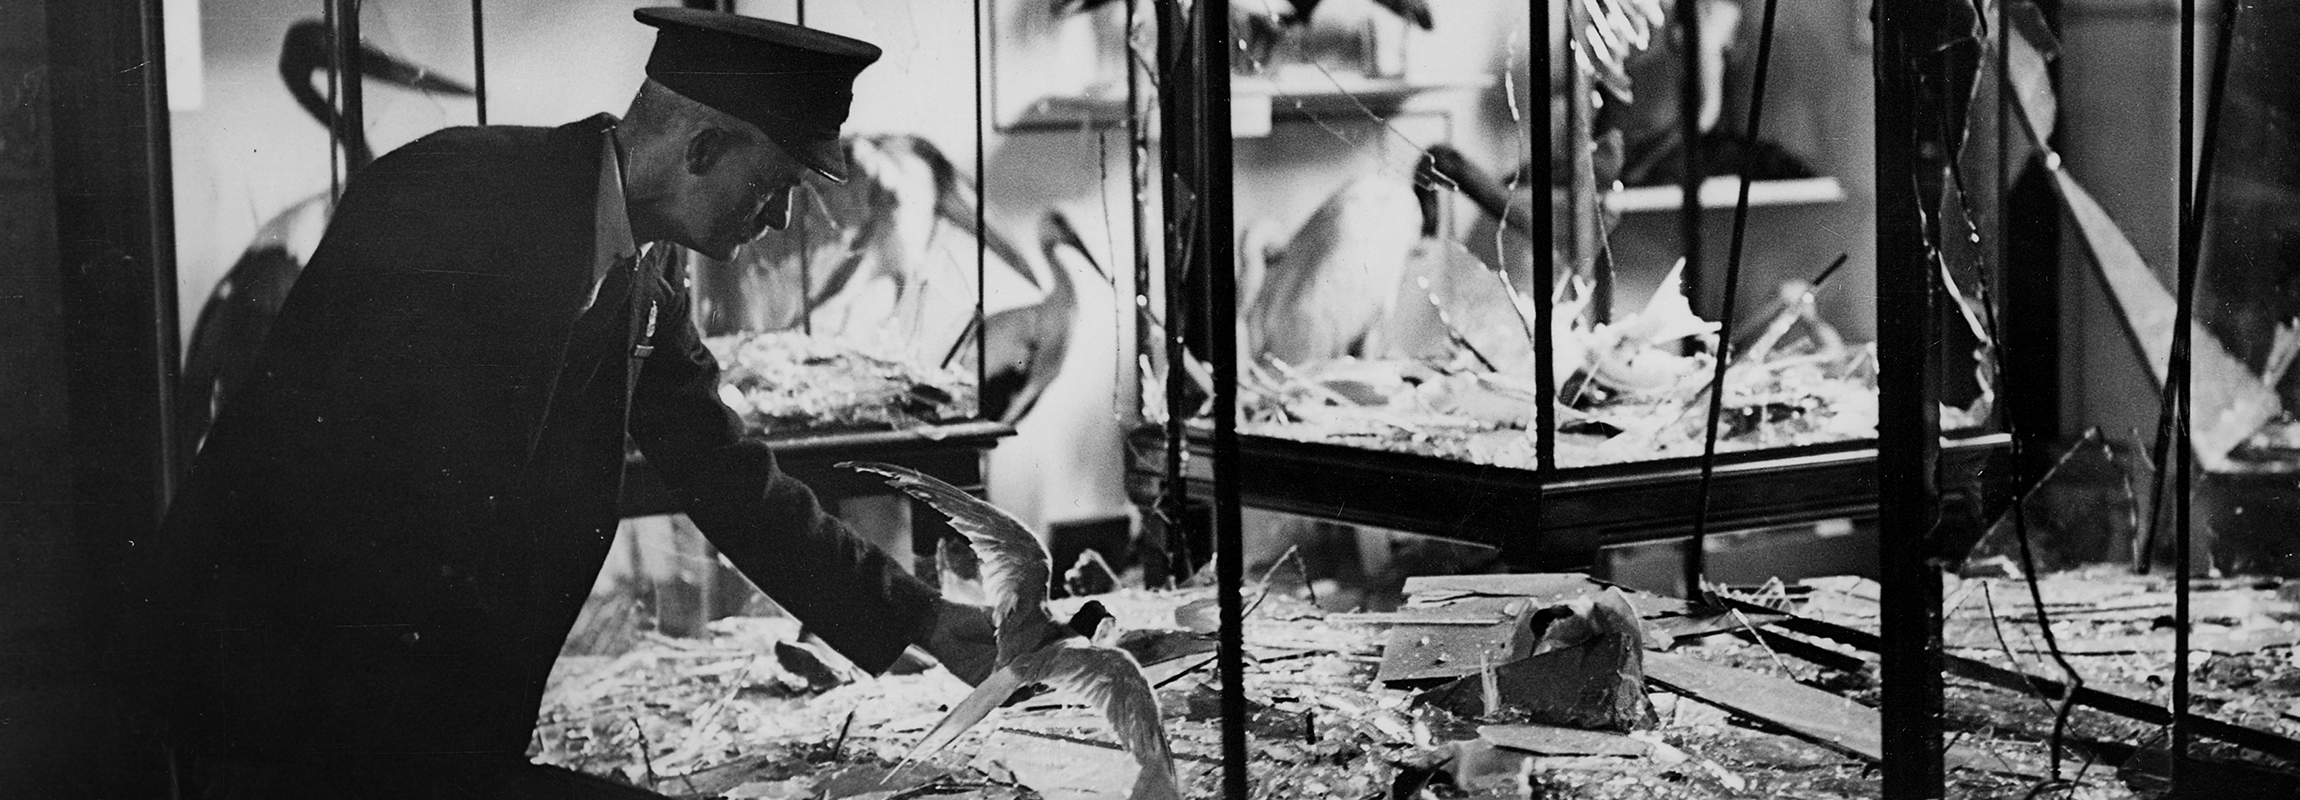
A Museum warder retrieves a tern from a shattered display case. On 11 July 1944, a flying bomb landed on Cromwell Road breaking all the glass in the west wing. © The Trustees of the Natural History Museum, London
© The Trustees of the Natural History Museum, London
The Museum at wartime
Kerry Lotzof and Josh Davis
In times of war, the Museum defiantly stayed open for as long as it could, its grounds were converted to community allotments and resident scientists put their minds to keeping troops and allies alive on foreign soil.
During the Second World War a number of the Museum's galleries were commandeered to provide tools and training for British secret spy networks.
Photos from the archives reveal the Museum's little-known contribution to the war effort and offer a glimpse of life on the home front in one of London's most iconic buildings.
Home front
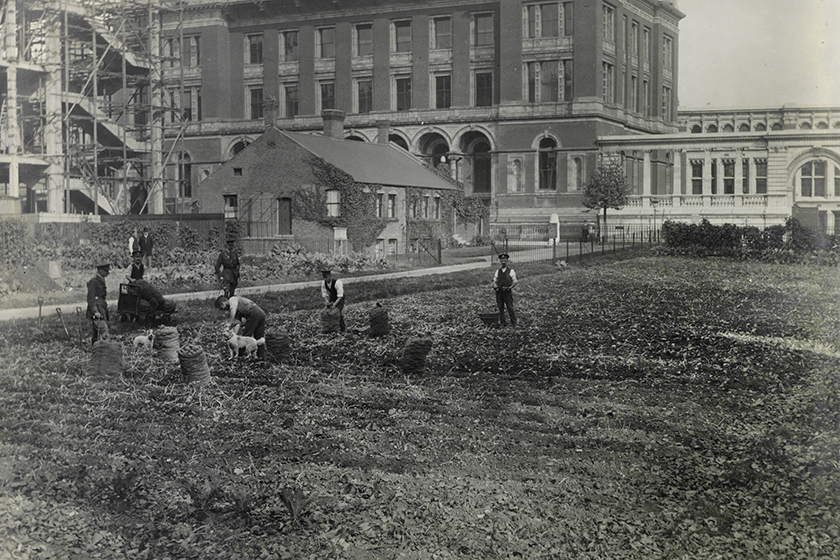
Victory gardens (also known as war gardens) and allotments were cultivated in private residences and public spaces to augment food supplies during both world wars. Farms were established at the eastern end of the grounds and tended by staff and wounded soldiers. In this photo the Victoria and Albert Museum is visible in the background.
© The Trustees of the Natural History Museum, London
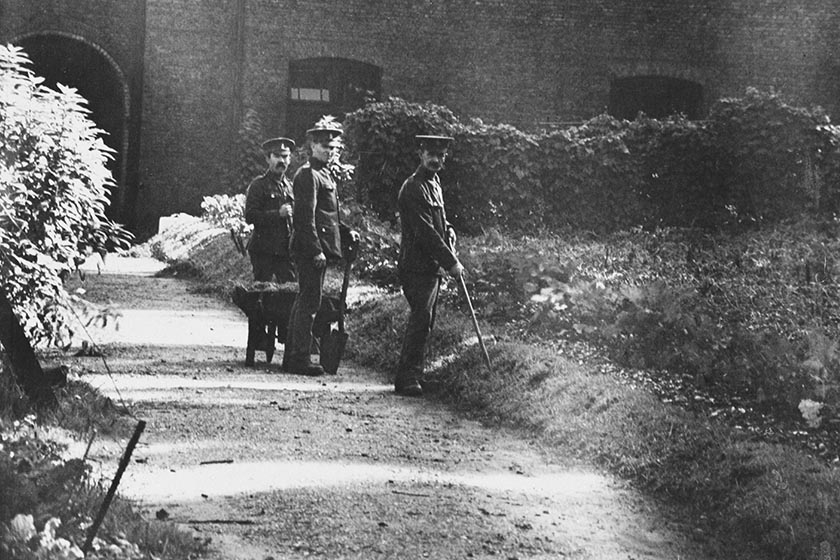
To support the well-being of the troops in the area, Museum allotments included potatoes, artichokes, cauliflowers and green crops. The farm also boasted chickens, rabbits and eight pedigree black Sussex pigs.
© The Trustees of the Natural History Museum, London
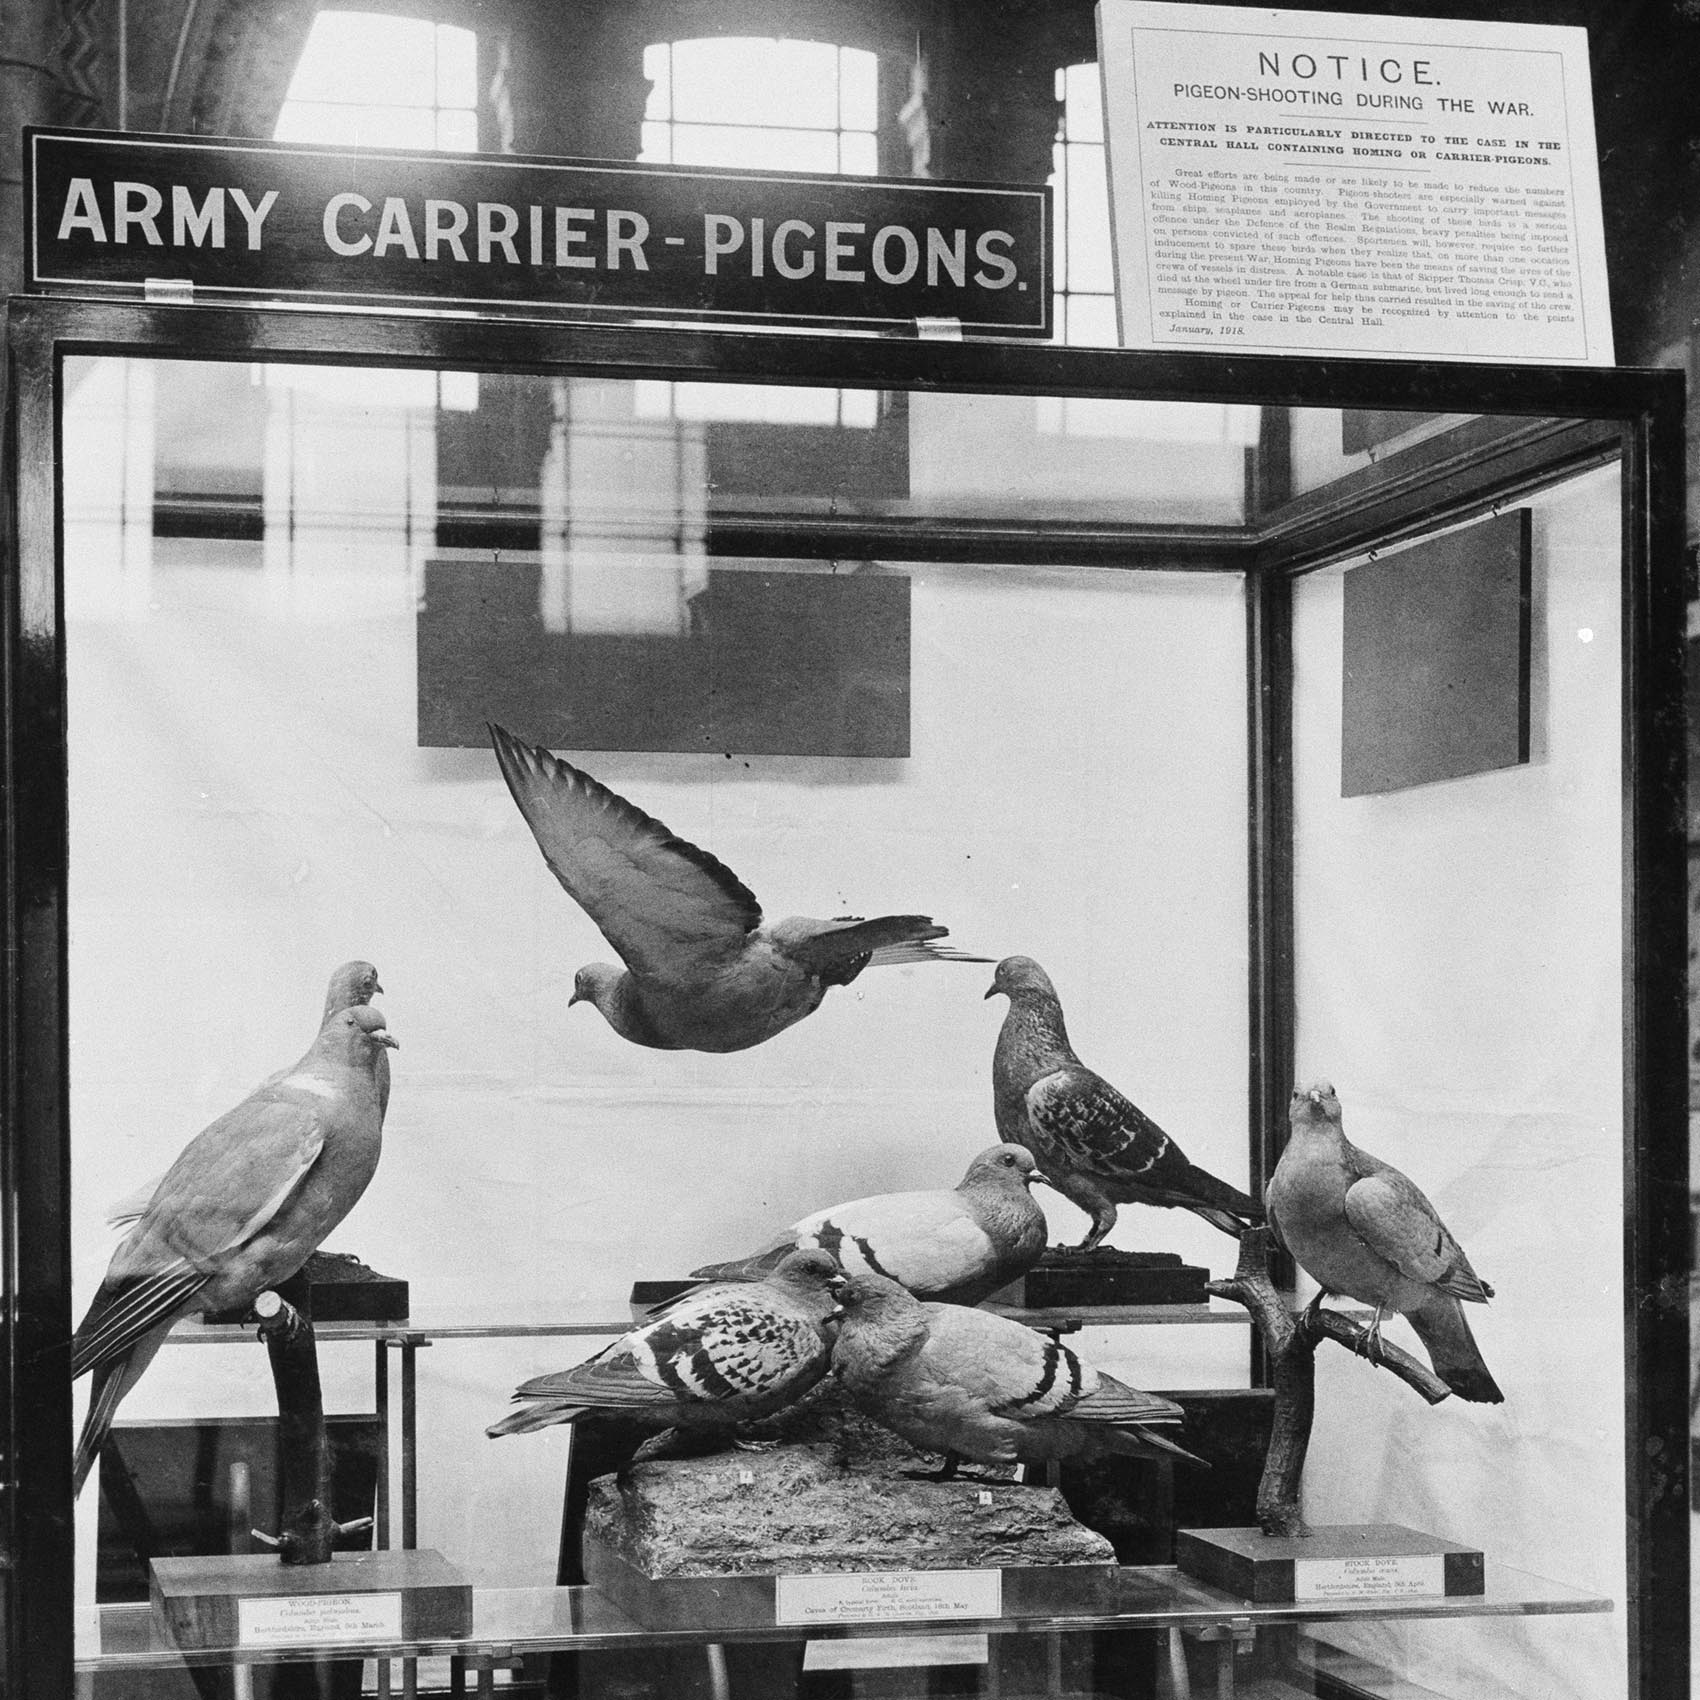
The Museum remained open to the public throughout the First World War, sharing knowledge to help the home front. Displays were created covering gardening, pest control and foraging.
As food shortages took their toll, carrier pigeons relaying military communications and life-saving messages from downed pilots sometimes ended up shot for pigeon pie.
This display of types of pigeons was created to help those at home tell the difference between ordinary wood pigeons, rock doves, stock doves and their carrier pigeon cousins
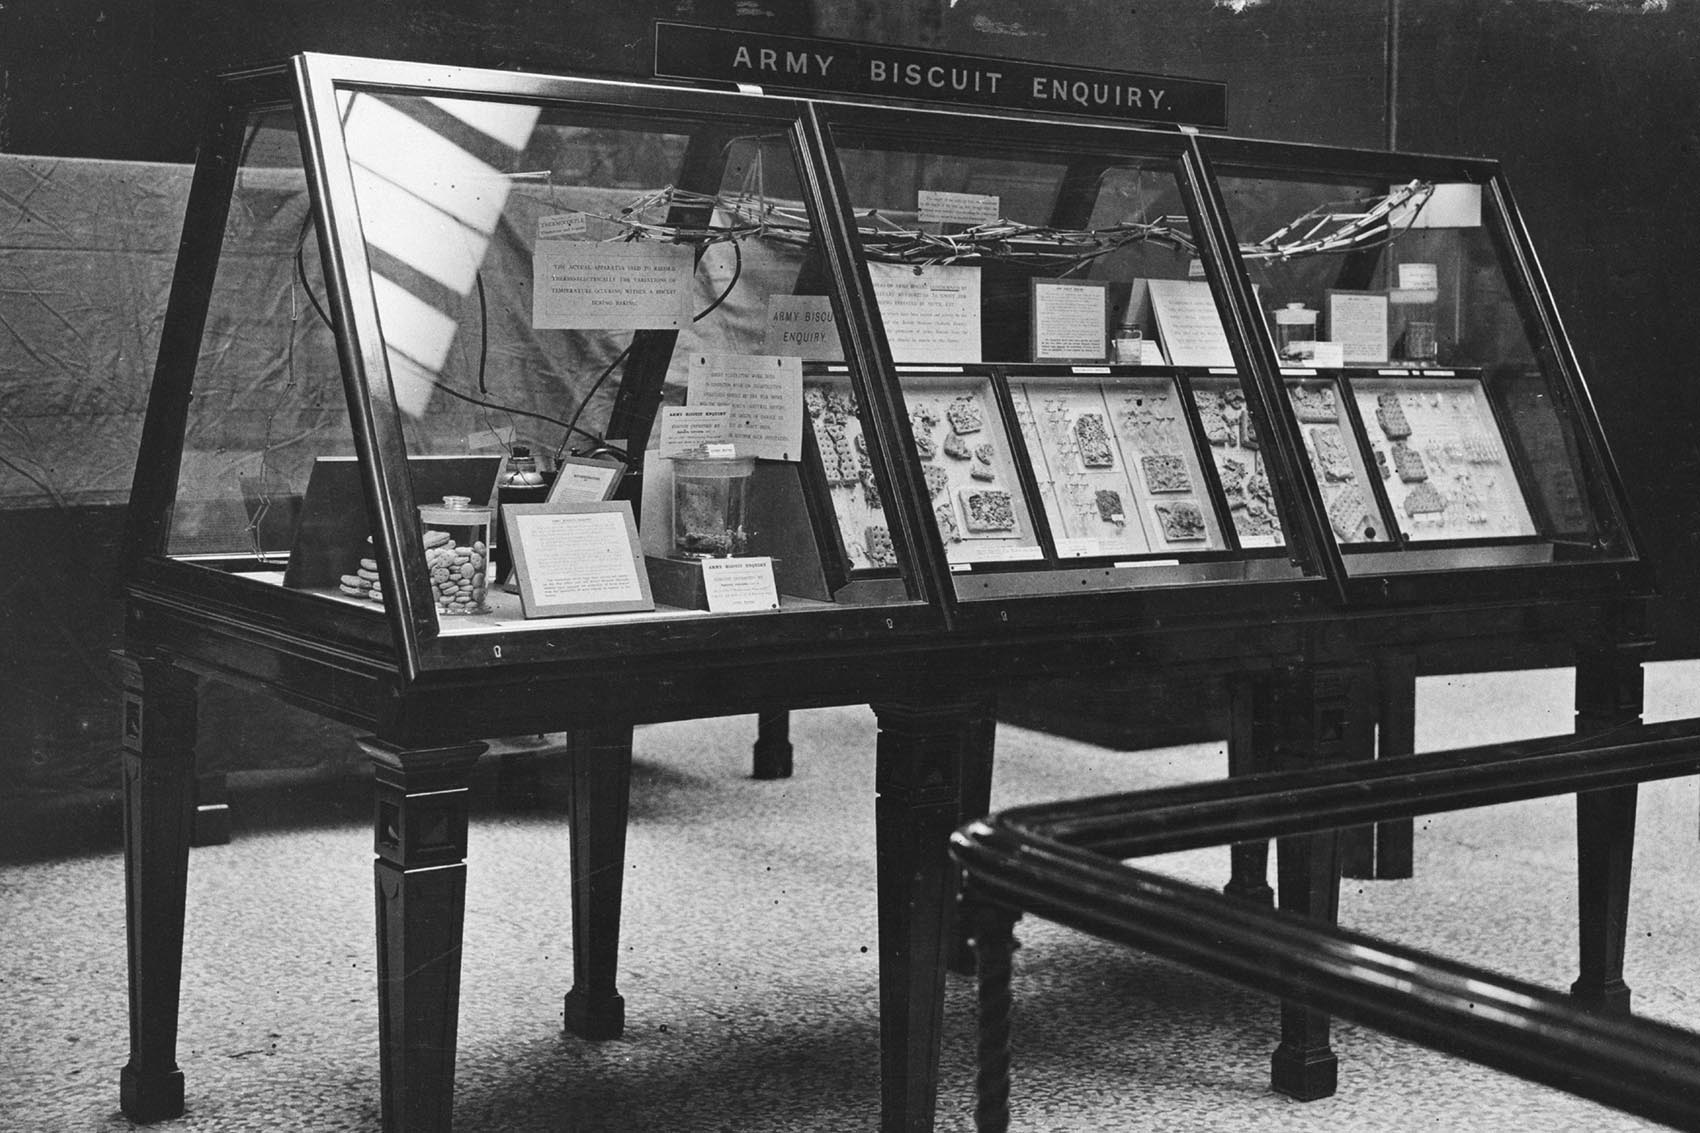
In 1910 the Museum received a request from the War Office. A batch of army biscuits - a staple of the military diet - which had been sent to troops in South Africa and Mauritius had been infested with moths and become inedible despite being transported in hermetically sealed jars.
John Hartley Durrant of the Zoology department was asked to investigate. He concluded that eggs must have been laid at some point between baking and packing the biscuits, with larvae developing later inside the sealed tins
War horses
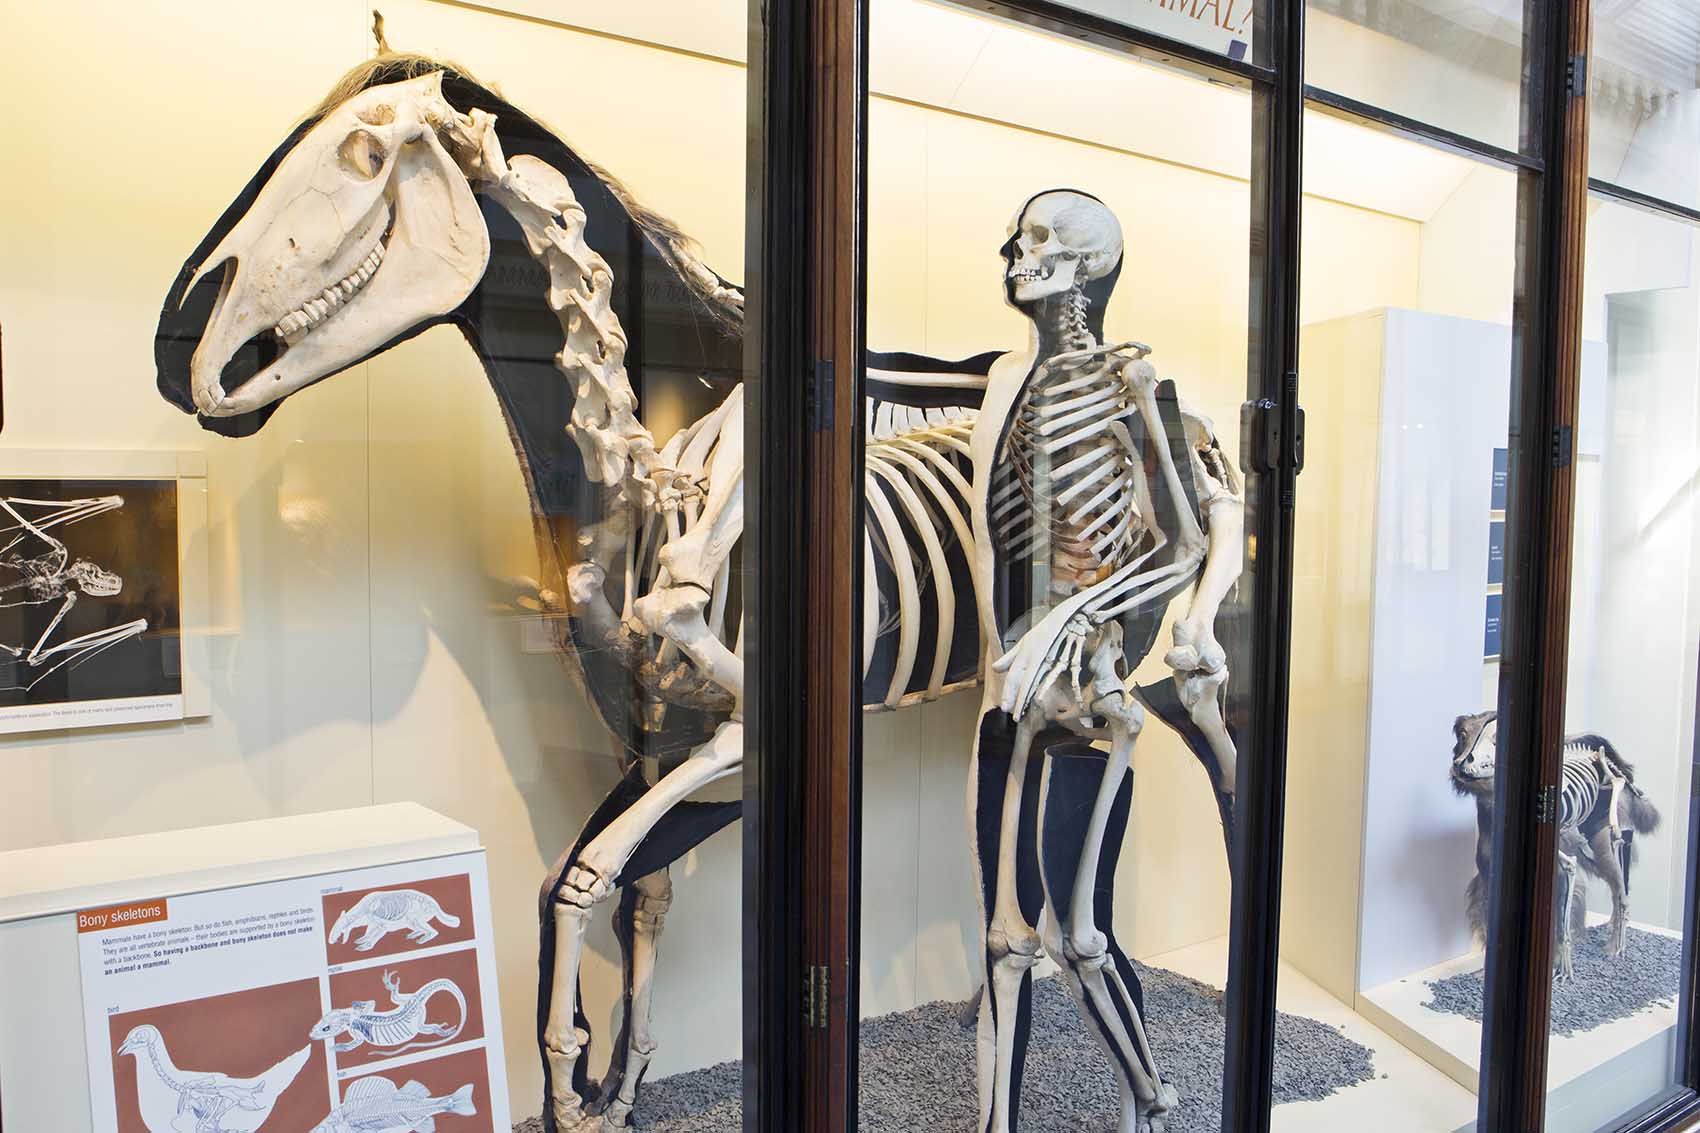
During the First World War, British forces used over one million horses and mules to pull heavy machinery, carry supplies and provide transport.
This proved essential for the war effort. In 1914, Lieutenant Colonel E Lloyd Williams of the 2nd London Division applied for permission for his men to visit the Museum and study the anatomy of horse specimens on display. Today, visitors can still see one of these specimens in the Mammals gallery.
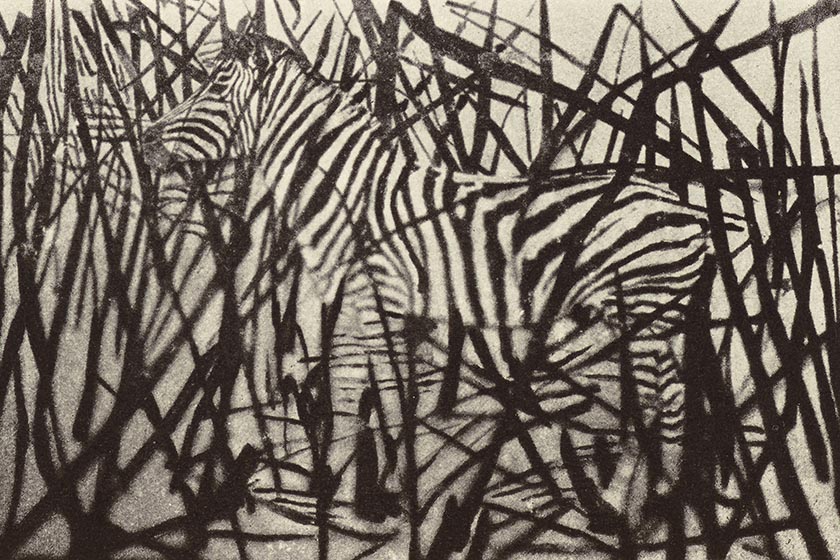
By 1916 the military's interest in concealing gun positions led them to contact the Museum for advice on how to achieve effective disruptive camouflage, drawing on nature as inspiration. Countershading, when the lower portion of an animal is lighter than the top, was frequently discussed, as was that of breaking up the outline of objects.
Photograph from Gerald Thayer's book, Concealing-Coloration in the Animal Kingdom, demonstrating disruptive camouflage © The Trustees of the Natural History Museum, London
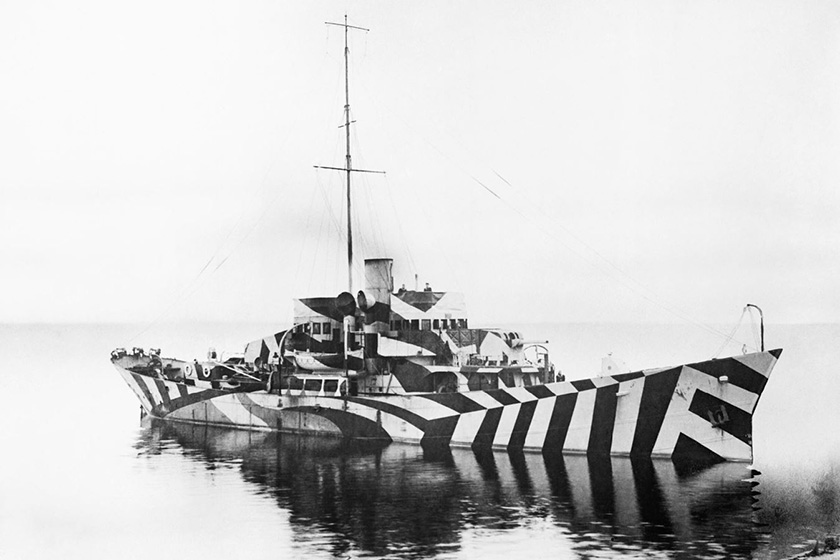
The study of how animals conceal themselves in nature helped to inspire some of the most inventive military camouflage, such as dazzle painting. It was used extensively on merchant boats during the First World War, though it was quickly realised that standard camouflage on the open ocean was impossible. Instead the aim was not to blend in with the surroundings but to make it difficult for attacking vessels to assess a boat's speed, range and direction of travel.
HMS Kilbride taken by Surgeon Oscar Parkes © IWM (SP 706)
Somme butterfly
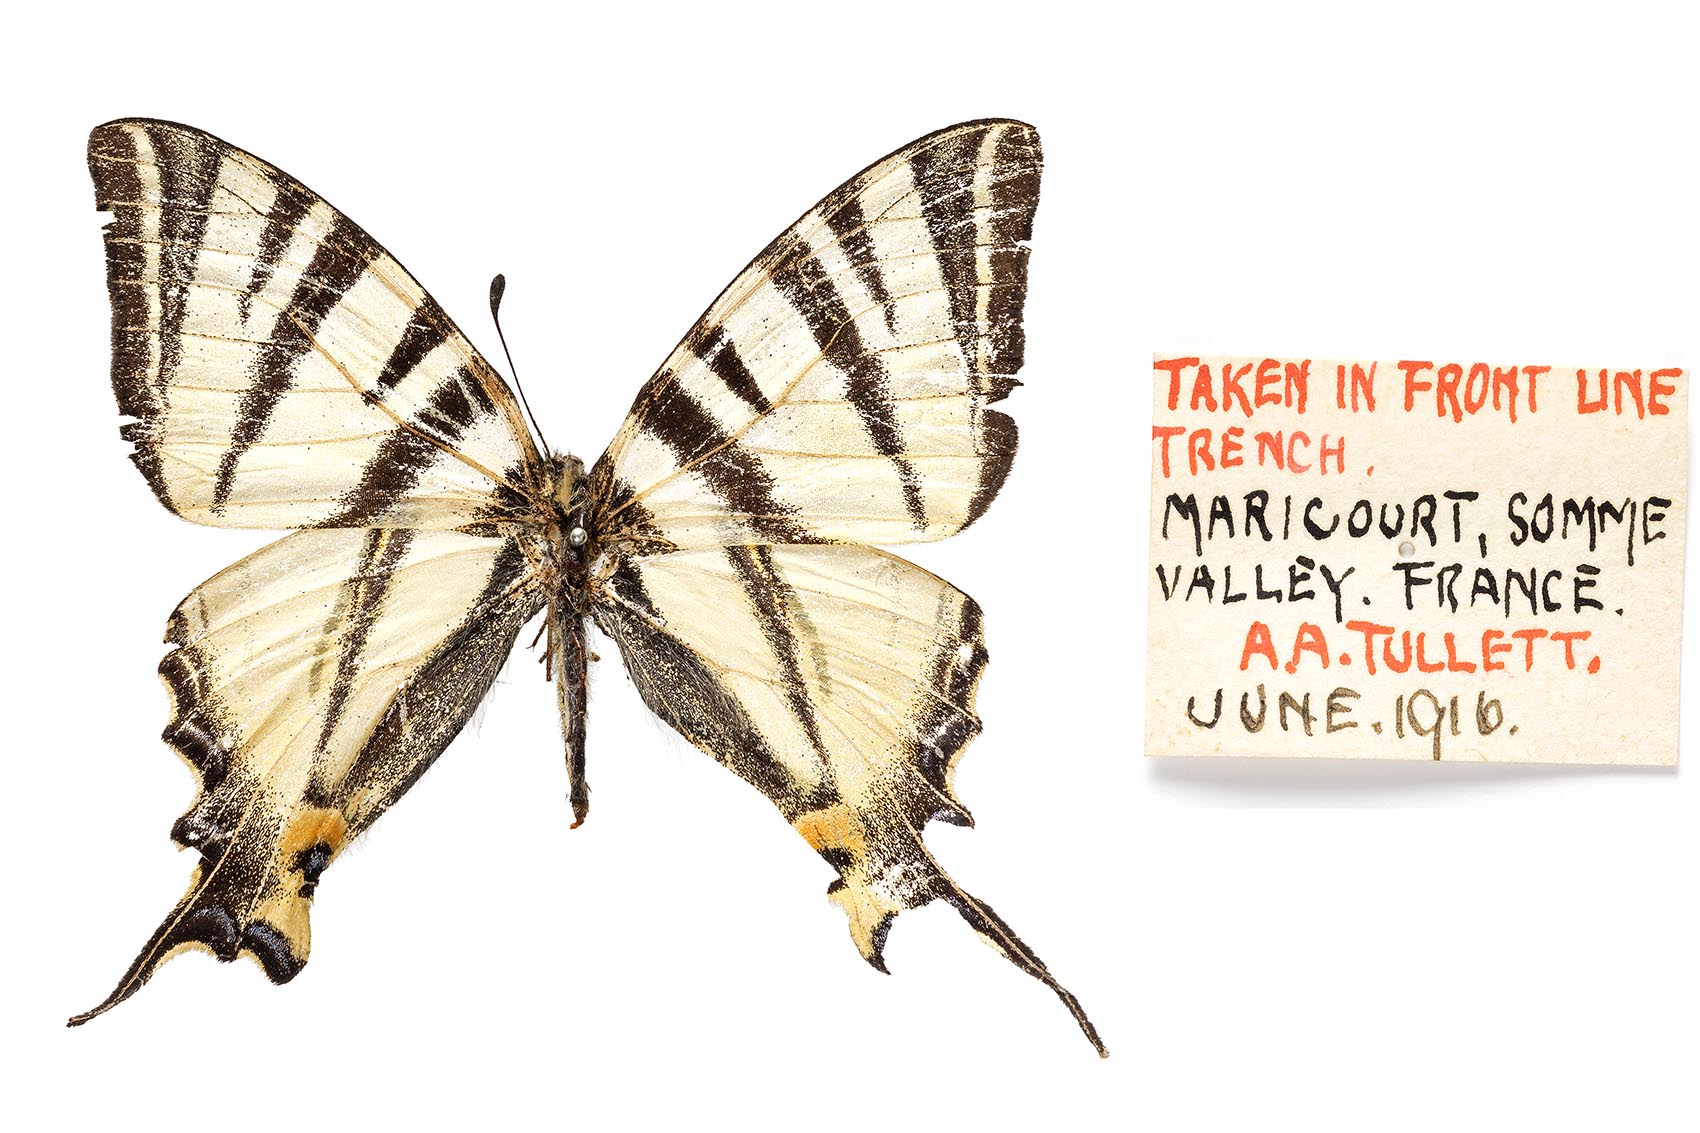
This rare swallowtail butterfly, Iphiclides podalirius, was captured in 1916 in a front line trench at Maricourt in the Somme valley, by a soldier named A A Tullett. It was acquired by the Museum in 1934.

Over one million Indian troops served for the British during the First World War being deployed from the Western Front to German East Africa.
Following the London Victory Parade on 19 July 1919, the Indian soldiers who were treated in Brighton during the war were given tours of the Museum.
Spies in the Museum
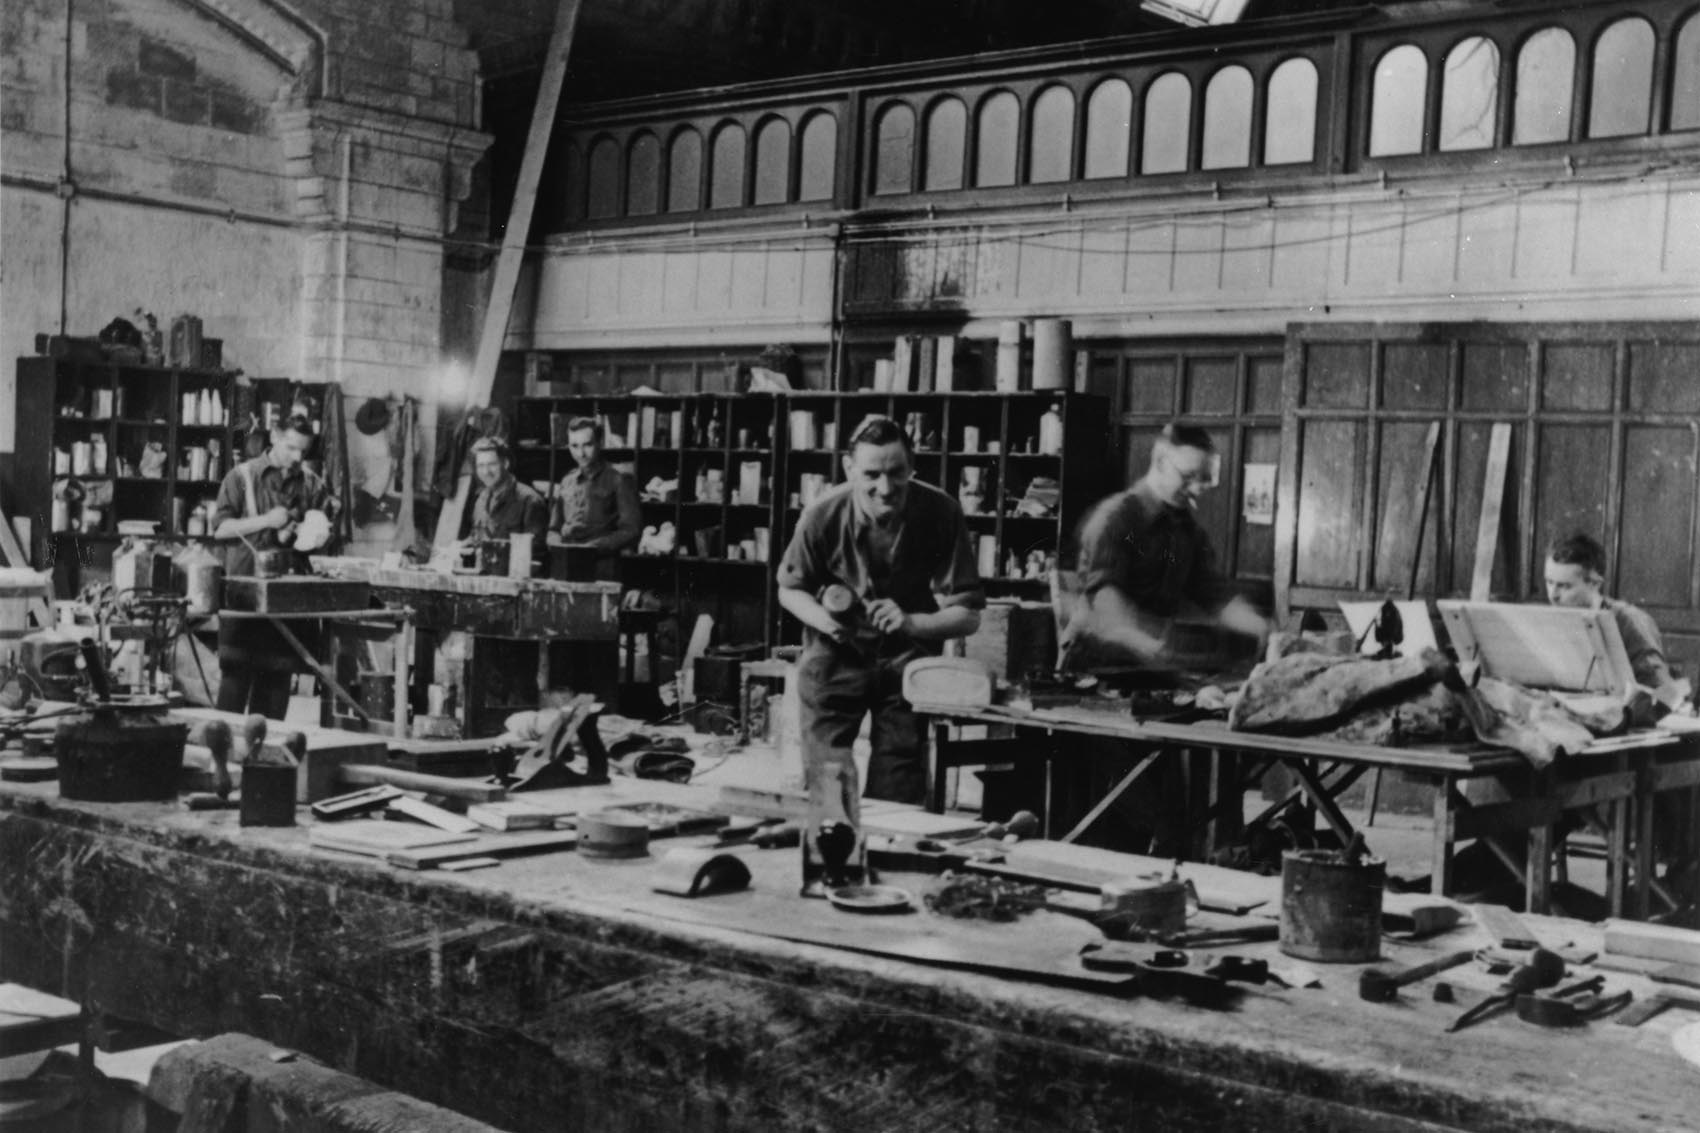
A British spy network called the Special Operations Executive (SOE) was formed in 1940 as a secret service under the aegis of the Minister of Economic Warfare.
Under the cover name Inter-Services Research Bureau, its mission was 'to aid and encourage all resistance to the enemy in occupied territories'.
Unbeknown to the public, the SOE sealed off several galleries to create a workshop and top secret demonstration room. Plasterers and carpenters prepared materials for agents in the field in a workshop at the north end of what is now the Jerwood Gallery.
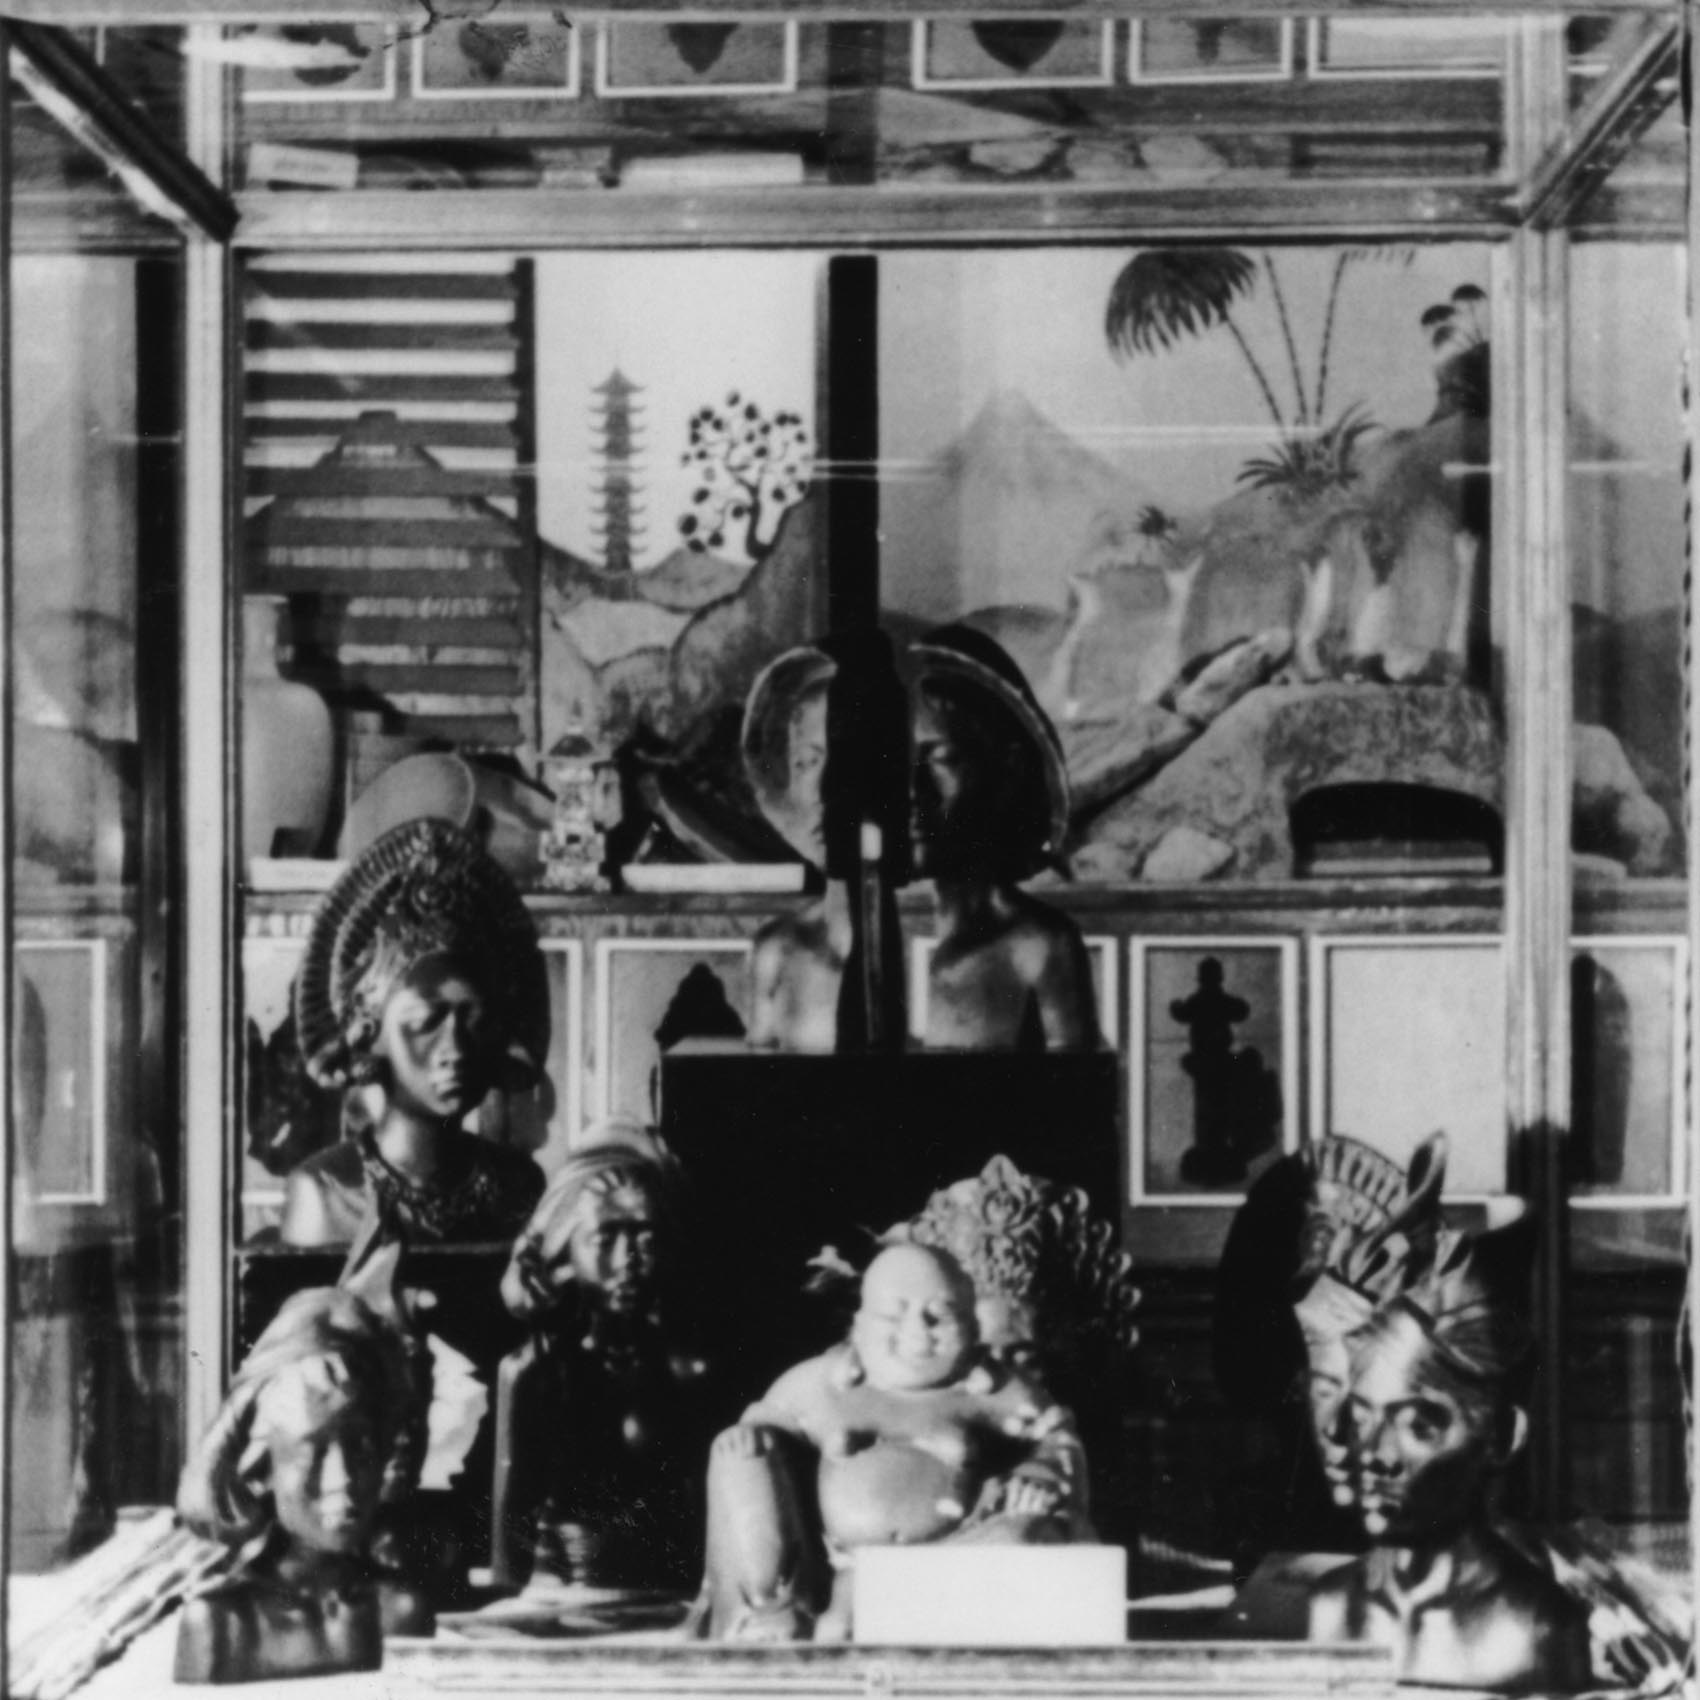
James Bond-style hardware created in the SEO workshop included innocuous-looking carvings cast in high explosive, coloured to look like wood, sandstone and porcelain and designed to be detonated by time delay. The War Office created catalogues of such devices explaining that local agents on the Eastern Front would pose as quayside hawkers and sell carvings to embarking Japanese troops.
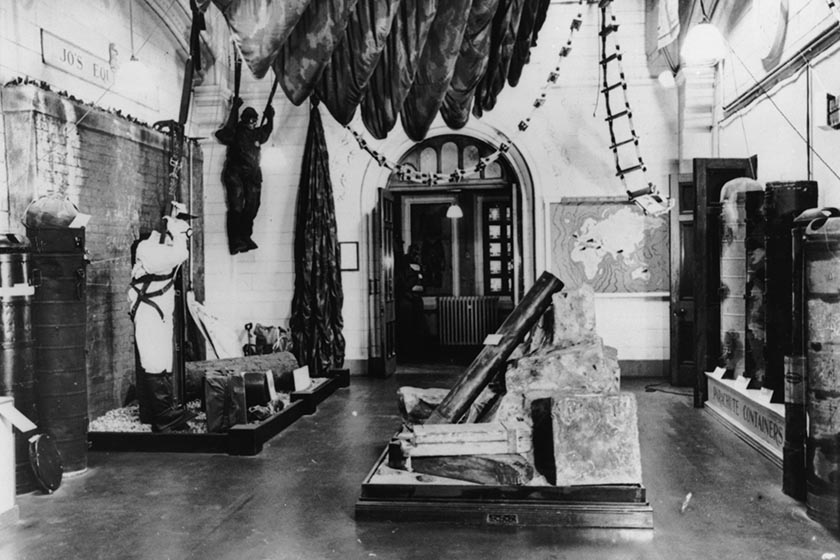
Several galleries were commandeered for a top-secret demonstration room designated 'Station XVb'. The displays were designed to inform agents about the tools available to them and to brief senior officials and dignitaries (including King George VI) about the SOE and its capabilities.
Archival photograph of SOE Military display, c 1943 © Imperial War Museum
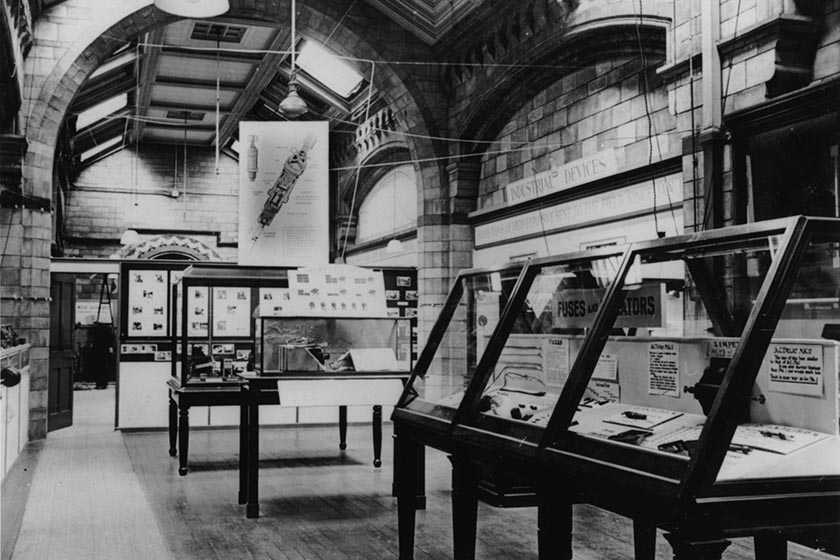
This room showcased tools to agents for use behind enemy lines. Among the devices made by the workshop were imitation coal to be filled with explosives, dummy logs to hide munitions, and ball and skittle sets which hid hand grenades and detonators.
Archival photograph of the Incendiary and Demolition Charges Hall, c 1943 © Imperial War Museum

One of the most curious weapons offered to agents in the catalogue of special devices and supplies was an exploding rat - literally, a rat skin filled with explosives.
War damage

Between September 1940 and April 1941 the Museum was hit by a number of bad air raids as the Luftwaffe targeted London, which then resumed in 1944 with the deployment of 'Doodlebugs' (V-1 flying bombs). These raids resulted in major damage to many parts of the Museum.
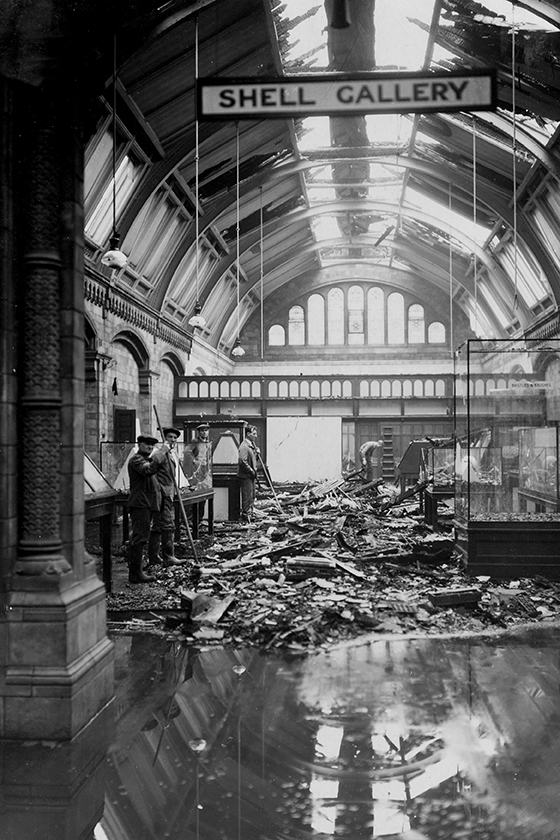
On the night of 16 October 1940, the Shell gallery (now the Jerwood Gallery) received a direct hit from an incendiary bomb. This damaged the roof and started a major blaze that staff struggled to get under control. They eventually achieved this by dousing the fire with copious amounts of water, but this severely flooded the Osteological department in the basement.
© The Trustees of the Natural History Museum, London
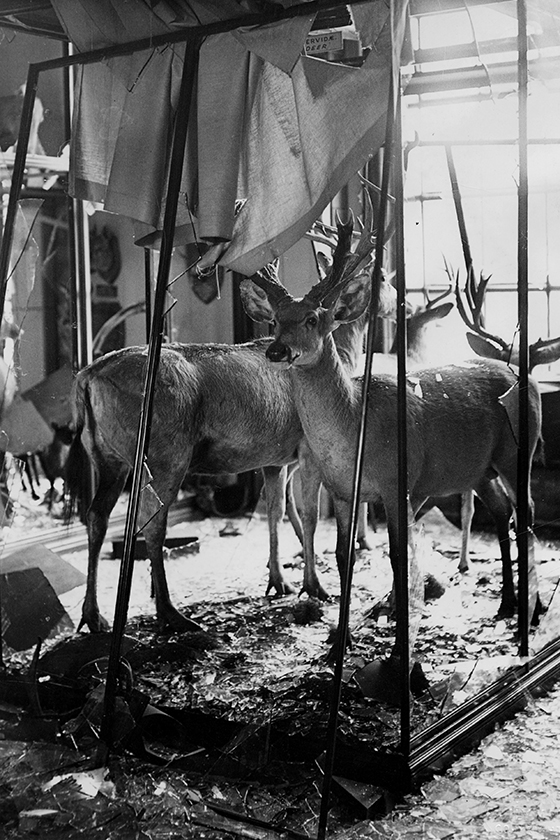
As a result of the bombing raids that occurred throughout the war, almost every window and glass display case at the Museum was shattered. Due to glass shortages, it would take years for them all to be replaced. Even today, some of the mammalian specimens are rarely moved as the fur is still embedded with fine shards of glass.
© The Trustees of the Natural History Museum, London
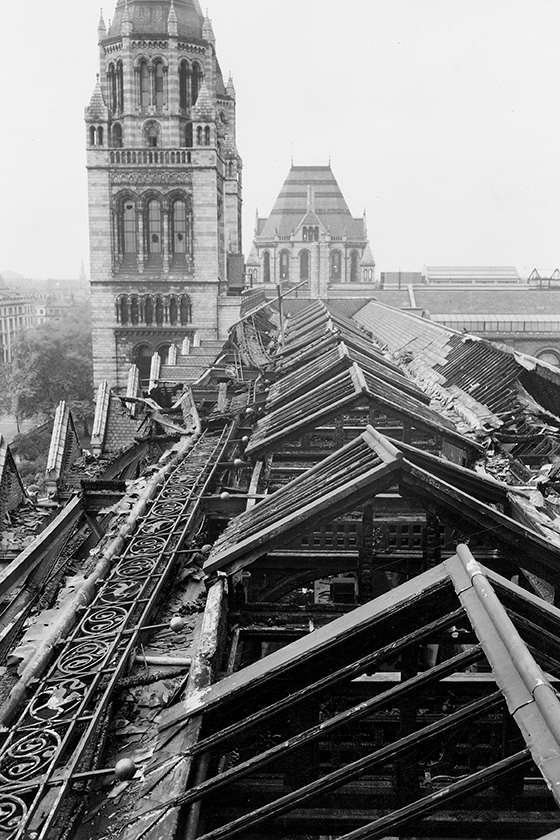
In the early hours of 9 September 1940 the east wing of the Museum, which housed the Botany department, was hit by two incendiaries and an oil bomb. The construction of the roof itself contributed to the severe bomb damage, as the series of tunnels that ran through it acted as flues that helped to fan the flames.
© The Trustees of the Natural History Museum, London
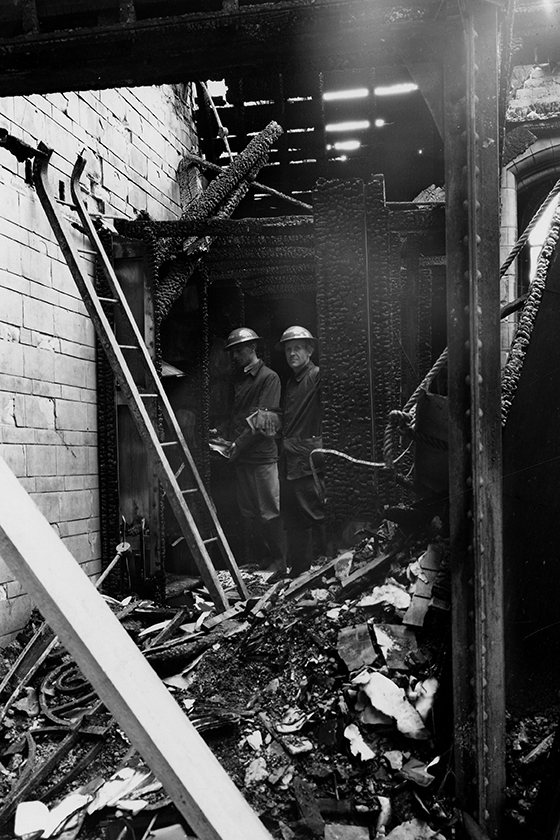
Located on the top floor of the Botany department, the General Herbarium was particularly badly hit. Many specimens and books were burnt in the raging fires that swept the building and destroyed parts of the collection. The fires were extinguished with water - so staff were in for a surprise when Chinese lotus seeds collected in 1793 began to germinate amid the debris.
© The Trustees of the Natural History Museum, London
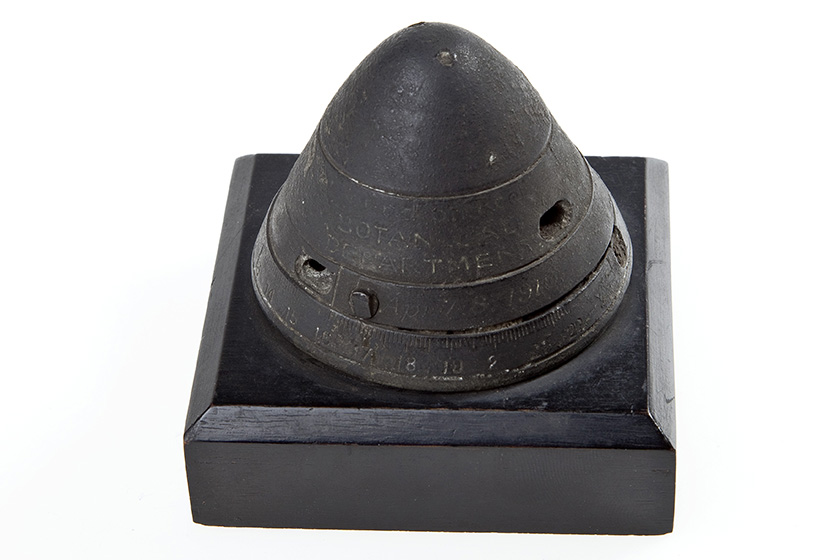
This shell fragment fell into the Reptiles gallery on 1 October 1917, causing slight damage to the roof but no injury. Rather than a result of German fire, it was identified as the nose cap of a shell fired from an anti-aircraft weapon used to defend the city. As hundreds of shells releasing thousands of bullets were fired at incoming German aircraft, there was a very real threat from shrapnel raining down on the streets and houses of London. This fragment is one of three shells preserved in the Museum special collections.
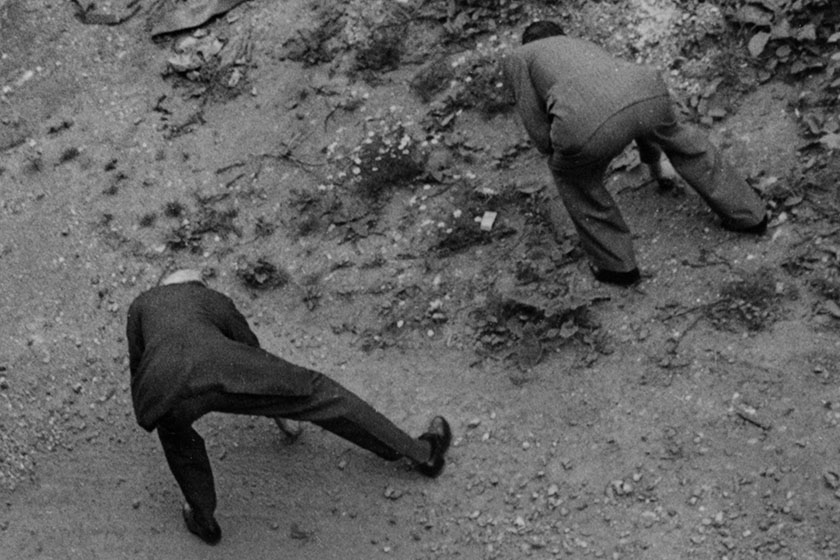
Shrapnel was also of concern during the Second World War. In this image taken in 1940, the Director of the Museum, Clive Forster-Cooper, and the Assistant Keeper of Geology, Arthur T Hopwood, search for pieces of shrapnel following a bomb raid in the grounds of the Museum as part of the national drive to collect scrap iron.
© The Trustees of the Natural History Museum, London
Flora from bombed sites
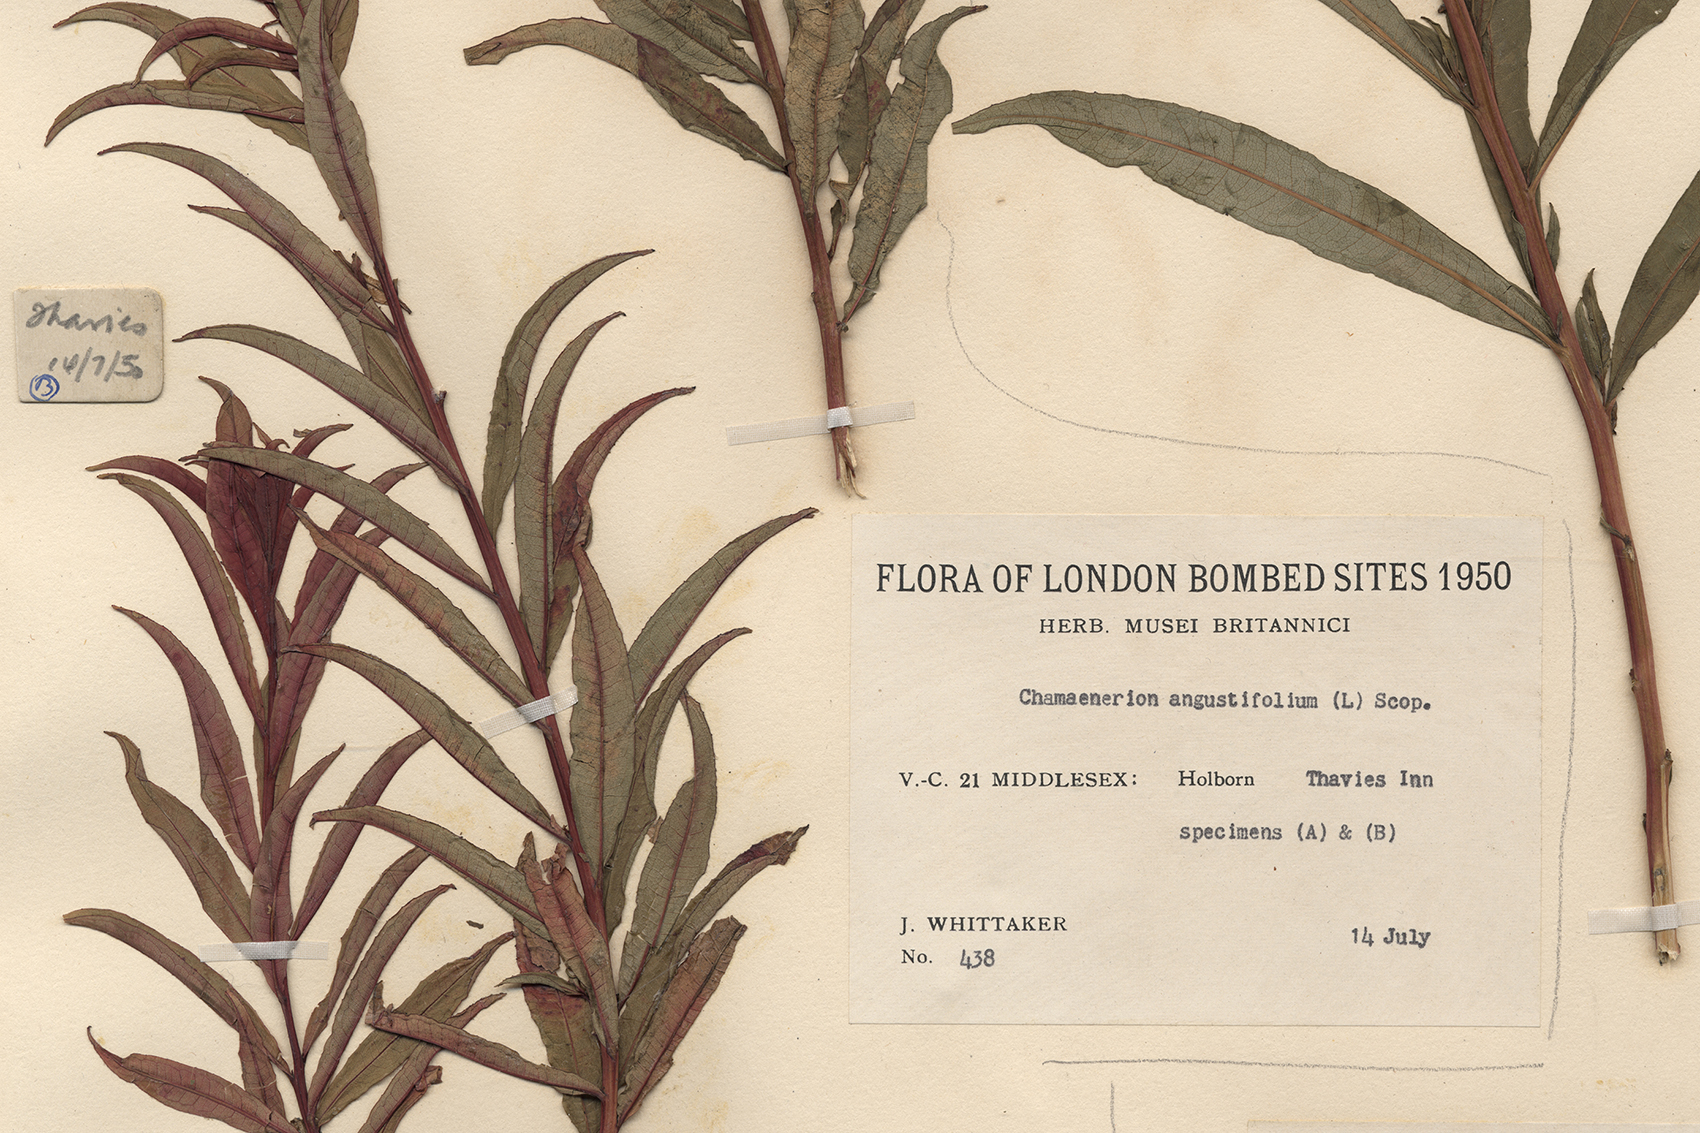
Chamaenerion angustifolium (fireweed) is a highly toxic plant that grows quickly after fire. It was a common sight amongst rubble and derelict buildings in London after the war.
This example was collected in Holborn, as part of a survey of the flora of London bombed sites conducted in 1950.
Visit the Museum
Visitors can still see two plaques memorialising the efforts that Museum staff played in both world wars. The first (located in Hintze Hall) honours the 68 men from the Museum who served in the First World War, 13 of whom did not return.
The second (found outside the Mammals Gallery) remembers the men and women who worked for the SOE.
More about the Museum at War
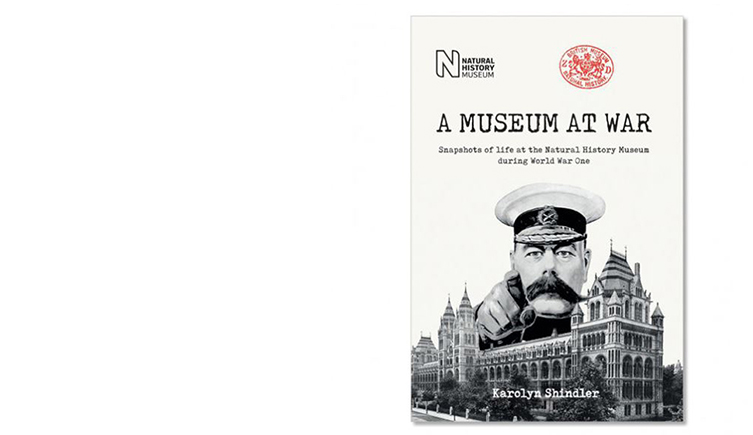
Drawing on records and letters from the Museum archives, Karolyn Shindler chronicles Museum life during the First World War in her book A Museum at War.
Don't miss a thing
Receive email updates about our news, science, exhibitions, events, products, services and fundraising activities. We may occasionally include third-party content from our corporate partners and other museums. We will not share your personal details with these third parties. You must be over the age of 13. Privacy notice.
Follow us on social media